Do-it-yourself Guide to Painting the Exterior of your Home
Published: Saturday, September 03, 2011, 7:30 AM
By Shannon Quimby, Special to The Oregonian
Editor’s note: Your house is your biggest asset. So if it’s starting to look a little shabby and painting it has moved to your must-do list, don’t be daunted by the prospect. We have information that can help you decide what colors to use as well as what you need to know if you want to paint it yourself. It’s a big project, though, and it comes with a couple of important caveats, so be sure to look at our two previous posts on staying safe on a ladder and what you must know about the danger of lead-based paint.
If your house is looking a little too shabby chic these days and needs repainting, you may want to save a few bucks and tackle the project yourself. But before you hit decision-making overload at the paint store and your head starts spinning with doubt, anxiety and endless questions, read these no-nonsense painting tips. In no time you’ll create a dramatic change. It’s one of your least-expensive ways to increase the value of your home.
BEFORE YOU BEGIN
Plan when to paint. In the Pacific Northwest, the painting season for house exteriors is late spring to early fall.
Head to your favorite paint store to stock up on materials and tools. Don’t be shy to ask the experts what you’ll need: They do this all day long.
Clear the surrounding area of furniture, flowerpots, hoses, garbage cans, cars and large debris.
Look up and check under the eaves for beehives and bird or wasp nests. Remove with care.
Make sure nothing is up against or hanging from the house. Remove any shutters and take measures to protect any landscaping that you care about.

PREPARATION
Check the condition of the current paint job. If the house has paint problems, educate yourself so you don’t go awry the second time. The section on paint troubleshooting will help diagnose the problem.
In this order, scrape, sand, dust, wash and prime.
When using a power washer you might be tempted to put bleach in it. Do not do this. It will turn an angry color and spray in unintended directions — the bleach can damage the seals and O-rings in the gun, wand, hoses and pumps, causing a breakdown of the machine.
Prep slowly; take the time. Prep is very important. It takes up to 50 percent to 75 percent of the time you put into the job but will save you money in the long run.
WASHING EXTERIORS
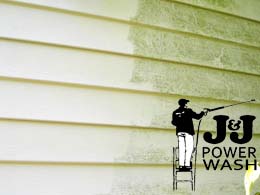
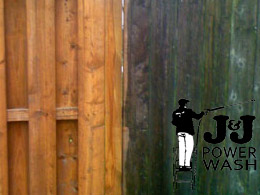
For the sake of saving time, a power washer is the way to go. If you don’t own one, you can rent or borrow.
Make sure all your windows and doors are sealed shut, cover any exterior electrical outlets, and make a mental note where your mailbox and outdoor lighting are located.
Wear goggles and wet-weather outerwear, because you are going to get wet.
When using a power washer, make sure to spray in constant motion approximately 3 to 4 feet away from surface. Spraying one spot can gouge your siding surface. You can test a small area first to get the feel of how the power washer works.
Spray from the top down, letting the cobwebs, caked-on dirt, dust and grime flow down the siding. You will probably have to do this a couple times.
Let the exterior dry completely. Wait at least one day for drying, or longer depending on air and surface temperatures.

PRIMER
Before you paint, you must prime. Use a primer when painting over new wood or bare wood, or when repainting over bright or dark colors.
When picking out a primer, read the label. Make sure it has excellent adhesion to your current surface, hides stains well, is blister resistant, dries quickly and has low odor.
If you are only touching up areas of your house you won’t need a lot of primer. One gallon usually covers up to 400 square feet.
PAINT SELECTION
Do you have oil or latex paint on your house? Peel off a large paint chip. If the chip bends slightly before cracking, it’s probably latex. Oil paint chips snap easily. If you’re still in doubt, take a sample to your local paint store and have them test it.
Latex paint is an environmentally safe paint made from a water-soluble base. It’s easy to apply and cleans up with soap and water. It dries quickly (one to two hours), is nontoxic, and expands and shrinks with weather changes. Most companies offer a low-VOC* (volatile organic compound; see note below) or no-VOC paint. Latex paint is the kind most commonly used by professionals.
Oil-based paint is very durable and water resistant and less susceptible to shrinkage. It dries slowly, usually taking 24 hours to cure. Over time, it becomes brittle, and the color fades. It’s highly flammable and is susceptible to mildew. It cleans up with turpentine or paint thinner and is considered hazardous to the environment. Never put a new coat of latex over an old coat of oil paint without properly preparing the surface by sanding lightly or washing with TSP** (trisodium phosphate; see note below), a common paint-prep cleaner, and then applying a latex primer. If you skip this step, your new coat of paint is guaranteed to peel.
PAINT SHEEN
Walk outside and look at your house color. Is it dull or shiny or somewhere in the middle? That’s the sheen of your paint. Sheen describes the degree of light reflection paint has.
If you like the current sheen, stick with that. And if you have the old paint, the label on the can will tell you what the sheen is.
If you have an older home, a flat sheen will hide most siding imperfections and is a good choice for the body of the house.
Satin — sometimes referred to as eggshell — offers a good combination of easy cleaning and moderate sheen. It works great for trim, window frames and surfaces that need routine cleaning.
If you want a sleek, eye-catching look, a gloss sheen is your preference. It cleans easily, and is great for high-traffic areas like door jambs and window casings. But it shows imperfections and can fade.
COLOR
If you are confident of selecting the right color combination, go for it. Otherwise, there are lots of resources to try. Many paint companies, for example, offer tried-and-true color combinations; online, lots of sites show possibilities. Or you may want to hire a color consultant, who would be less expensive than repainting the whole house again.
Once you have the colors you think you want, buy a few quarts and paint small areas directly on the house in different locations. Or make sample boards.
Take a look at the paint during several times a day. Light and shade dramatically change the color of your house.
If you see a color combination on another home, politely ask the homeowners if they will divulge their color selection and brand of paint. I recommend not matching the next-door neighbor’s color combo.
SPRAY/BRUSH
If you plan to paint the entire exterior or a large portion of your house, a paint sprayer is the way to go. But be prepared for long hours of prep work. Everything that will not be painted must be covered.
Spray painting overrides surface imperfections such as gaps and cracks much better than a roller or brush and provides a superior, even coat of paint.
For painting small areas, invest in high-quality paintbrushes rather than economy ones. The good ones apply paint more thickly and smoothly, and hide brush marks. They do not shed or fall apart.
A 4-inch brush with tightly packed bristles is best for siding when needed. And an angled sash brush 1 inch to 2 1/2 inches wide is perfect for trim, window frames and moldings.
PAINTING
One rule you should never break is painting on bare wood. You must prime first.
Paint within a 50 to 80 degree air AND surface temperature.
Avoid painting in direct sunlight unless early or late in the day. The slower the paint dries, the better it sticks.
It will cost more, but using primer and two coats of paint is the way to go. Two thin coats are more durable than a single thick one.
NOTES
* The U.S. Green Building Council’s Green Building Guide (greenhomeguide.com) has this information on VOCs: They are carbon compounds that evaporate at room temperature and react in sunlight to form ground-level ozone, an integral component of photochemical smog. VOCs can cause respiratory, skin and eye irritation; headaches; nausea; muscle weakness; and more serious ailments and diseases.
**TSP — trisodium phosphate — available at most paint and hardware stores, has been the cleaner of choice for decades because of its ability to cut grease. But it’s very strong and can cause irritation and even burns, so be sure to follow the manufacturer instructions for mixing, clothing and safety precautions. You can also request a Product Safety Data Sheet (also known as a Material Safety Data Sheet) from the retailer.
If you are in the Greater Philadelphia area and are in need of pressure washing, power washing, window cleaning, graffiti removal or vehicle cleaning services, contact our Philadelphia Pressure Washing company at 215-703-8306.


