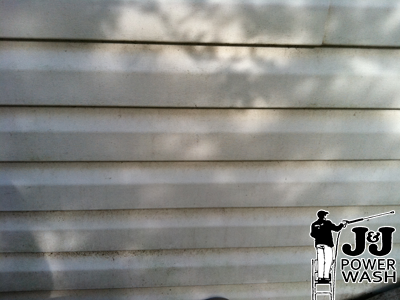
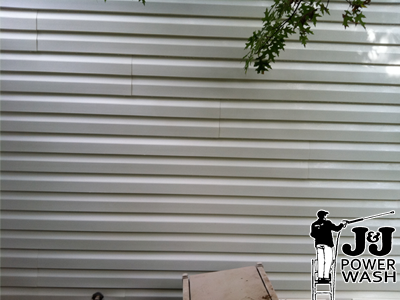
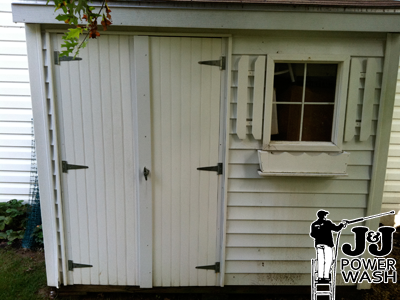
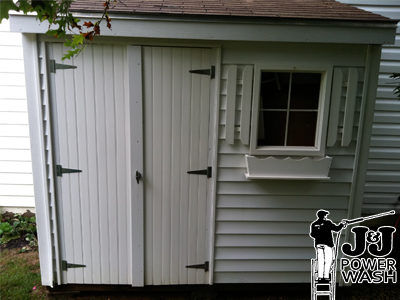
Take a look at before and after pictures of a vinyl shed we cleaned in St Davids. If you are in the Greater Philadelphia area and are in need of pressure washing, power washing, window cleaning, graffiti removal or vehicle cleaning services, contact our Philadelphia Pressure Washing company at 215-703-8306.
Before and After Pictures from Villanova, Pa
Take a look at before and after pictures of a vinyl shed we cleaned in Villanova. If you are in the Greater Philadelphia area and are in need of pressure washing, power washing, window cleaning, graffiti removal or vehicle cleaning services, contact our Philadelphia Pressure Washing company at 215-703-8306.
Pressure Washing Your Car
Pressure Washing Your Car
If you have both a car and a pressure washer, you will know just how convenient it is to clean your car using a pressure washer. If you have noticed, every car wash business uses pressure washers when cleaning their customer’s car. This alone can be enough proof of their effectiveness as well as their efficiency when it comes to cleaning cars. If you have a pressure washer unit, you will enjoy the advantage of its cleaning power as you will be able to clean your car in less time while doing less work. This is possible because a pressure washing unit is capable of generating enough force to propel water at great speeds which is enough to remove most dust, dirt, mud, and muck clinging on the surface of the car.
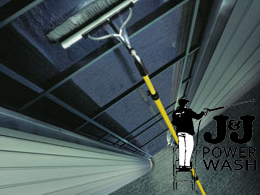
If you live somewhere in the north where they spray salt to melt the ice on icy roads, you will know just how helpful salt can be in clearing up the ice on the road to prevent cars from slipping. However, just as being helpful does not mean it does not have any consequences on its use. As we all know, salt can hasten the formation of rust and if your vehicle gets a spray of salt here and there from passing cars, then the possibility of rust formation in your car is inevitable. This makes it very important to clean your car regularly to prevent rust from building up in your car. In order to clean your car properly, you can either go to a car wash, or if you have a pressure washer, you can do this from the comforts of your home. Although washing your car personally may require a bit of your time and energy, the reward of doing hands-on cleaning however allows you to give your cleaning that more personal touch.
If you live on warmer climates and regions, you will without doubt be plagued with dust and sand. There are times the dust on your car can get too thick that you will be able to scribble your name using your fingers on it. The truth is regardless of where you live, washing your car is a must if you want to ensure that your car not only looks good, but also stays looking good.
When pressure washing your car, it is suggested that you have a good idea of how much pressure you unit can generate as too much pressure have the capacity to strip off paint. If your unit generates around 1200PSI to 2000PSI, this would be enough to not cause any concern. However, if you unit generates a much higher pressure, it is suggested to perform your washing from a distance of at least 10 feet first to lessen the force impacting the surface of your car. From that gap, start closing the distance until your desired cleaning effect is achieved. Remember this distance throughout your cleaning task. If possible, it is best to wash it first using a chemical injector to apply car detergent while using a 25° spray tip. This will allow you to soften and remove the dirt while applying car detergent at the same time. Make sure to start from the top going down so that no dirty water gets to the part that has already been cleaned. Once your done applying car detergent and removing the dirt from your car, start using the 40° spray tip to rinse your car from any detergents and residues. Once you are done rinsing, it is heavily suggested to dry your car.
How to Powerwash Brick
Brick walls make for a classic exterior appearance to a house. They do require periodic cleaning to stay looking brand new, however. You can clean a brick wall with a moderate amount of time and effort with a pressure washer.
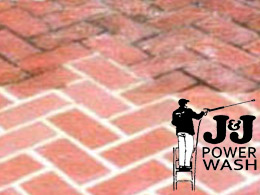
Instructions
1) Protect the area adjacent the brick that you want to wash. Wet and cover all surrounding vegetation, cover or disconnect any nearby electrical components and close all doors and windows. Purchase a cleaning detergent for use in pressure washers, which are available at most home improvement stores.
2) Patch any cracks in the brick or mortar to prevent water from seeping behind the wall and let the patches dry for a week.
3) Adjust the tip on the pressure washer nozzle to low pressure mode. Refer to the owner’s manual of the pressure washer on how to adjust the pressure. Put the detergent injection tip into the cleaning solution.
4) Aim the pressure washer at the brick wall and depress the trigger. Work from the bottom to the top of the wall in sections.
5) Scrub any stubborn dirty areas on the brick with a stiff bristle brush. You may need to pay particular attention to the mortar as it’s usually a lighter color and shows more dirt.
6) Switch the pressure washer to high pressure mode and remove the injector from the cleaning solution. Purge any detergent from the pressure washer by spraying until no more suds come from the nozzle.
7) Wash off the detergent residue from the brick. Start from the top and rinse down the wall in sections.
8) Make sure to rinse down the brick thoroughly and don’t leave any detergent on the surface of the brick.
Read more: How to Pressure Wash Brick | eHow.com http://www.ehow.com/how_2123982_pressure-wash-brick.html#ixzz1Y2Gbrd6B
If you are in the Greater Philadelphia area and are in need of pressure washing, power washing, window cleaning, graffiti removal or vehicle cleaning services, contact our Philadelphia Pressure Washing company at 215-703-8306.
Power Washing 101 The Principles
Power Washing 101 The Principles
by 3dViewingAngle.com
Power washing also acknowledged as pressure washing is an essential house upkeep support you will want to take into account on a regular and ongoing foundation to hold properties, driveways and parking lots safe and sound and beautiful. Pressure washing is the greatest time saving device for residence proprietors for taking away dust, mildew, dirt or bird residual. We also advocate electrical power washing a residence if you are obtaining all set to paint. Electricity washing will eliminate the chalky residue from outdated oil or latex paint and assist the new coat of paint to adhere correctly.
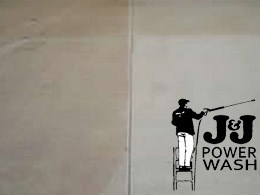
Electrical power washing can be employed on several surfaces like: wooden, granite, asphalt, concrete, bricks or aluminum. We do not suggest energy washing hardboards simply because they are vulnerable and can turn out to be damaged.
What are the 4 crucial components of energy washing?
There are 4 elements to the power washing process: strain, drinking water movement charge, cleaning answer and warmth. If 1 of these components changes, the total cleaning attributes change. For instance, if you select to use a cold drinking water instead of making use of very hot water, you will have to include a lot more chemicals, use larger stress and / or use much more water to accomplish related final results.
What is the function of detergents?
Detergents emulsify the dust much better and quicker as the drinking water temperature increases. This is particularly true when cleaning oil or grease from a concrete surface area.
How does power washing function?
The procedure breaks the bond between dust and the surface area currently being cleaned. The much more drinking water that is delivered for each moment, signifies that more rapidly cleansing can arise. This is particularly critical when removing components like mud or road tar. Be aware: Versions in work dimension, conditions and operator skill could affect the finish outcome.
What are some terms to be informed of?
Gallons Per Minute GPM. The far more gallons per minute employed, result in a reduced cleansing time. Be positive to ask your likely contractor what is the GPM price they will use on your project.
Lbs per Square Inch PSI is a rating code to determine the strength of the electrical power washer. The wonderful the number, the stronger the h2o stream can clean. For illustration: to appropriately thoroughly clean a concrete driveway, we advise utilizing at minimum 3000 PSI.
Stress Washer Hose
A wire-braid high stress hose can be rated up to 4500 PSI. This hose is normally grey in colour and can be utilised freely on any surface area with out worries of perhaps leaving marks on the property partitions.
Start with a Program
Just before you get started a energy washing task, get some time to make a program. We provide a useful checklist to aid you program your following electricity washing venture. Verify our website: HBEquipmentCo.com for particulars.
Here are some ideas:
– Decide which day of the week is heading to have the least traffic and interferences.
– Timetable the electricity washing treatment to get started previously sufficient to stop before dusk.
– Get rid of cars, trash bins and other products for the driveway to be taken care of.
– Decide on up litter and sweep the driveway of loose dust and grime.
– A pre-treatment method solution or degreaser could be suggested for excessively huge or dirty spots.
– Soaking the total driveway with a cleansing answer for 5-10 minutes might be suggested.
Do-it-yourself Guide to Painting the Exterior of your Home
Published: Saturday, September 03, 2011, 7:30 AM
By Shannon Quimby, Special to The Oregonian
Editor’s note: Your house is your biggest asset. So if it’s starting to look a little shabby and painting it has moved to your must-do list, don’t be daunted by the prospect. We have information that can help you decide what colors to use as well as what you need to know if you want to paint it yourself. It’s a big project, though, and it comes with a couple of important caveats, so be sure to look at our two previous posts on staying safe on a ladder and what you must know about the danger of lead-based paint.
If your house is looking a little too shabby chic these days and needs repainting, you may want to save a few bucks and tackle the project yourself. But before you hit decision-making overload at the paint store and your head starts spinning with doubt, anxiety and endless questions, read these no-nonsense painting tips. In no time you’ll create a dramatic change. It’s one of your least-expensive ways to increase the value of your home.
BEFORE YOU BEGIN
Plan when to paint. In the Pacific Northwest, the painting season for house exteriors is late spring to early fall.
Head to your favorite paint store to stock up on materials and tools. Don’t be shy to ask the experts what you’ll need: They do this all day long.
Clear the surrounding area of furniture, flowerpots, hoses, garbage cans, cars and large debris.
Look up and check under the eaves for beehives and bird or wasp nests. Remove with care.
Make sure nothing is up against or hanging from the house. Remove any shutters and take measures to protect any landscaping that you care about.
PREPARATION
Check the condition of the current paint job. If the house has paint problems, educate yourself so you don’t go awry the second time. The section on paint troubleshooting will help diagnose the problem.
In this order, scrape, sand, dust, wash and prime.
When using a power washer you might be tempted to put bleach in it. Do not do this. It will turn an angry color and spray in unintended directions — the bleach can damage the seals and O-rings in the gun, wand, hoses and pumps, causing a breakdown of the machine.
Prep slowly; take the time. Prep is very important. It takes up to 50 percent to 75 percent of the time you put into the job but will save you money in the long run.
WASHING EXTERIORS
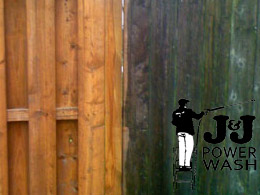
For the sake of saving time, a power washer is the way to go. If you don’t own one, you can rent or borrow.
Make sure all your windows and doors are sealed shut, cover any exterior electrical outlets, and make a mental note where your mailbox and outdoor lighting are located.
Wear goggles and wet-weather outerwear, because you are going to get wet.
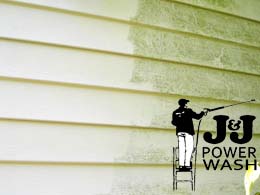
When using a power washer, make sure to spray in constant motion approximately 3 to 4 feet away from surface. Spraying one spot can gouge your siding surface. You can test a small area first to get the feel of how the power washer works.
Spray from the top down, letting the cobwebs, caked-on dirt, dust and grime flow down the siding. You will probably have to do this a couple times.
Let the exterior dry completely. Wait at least one day for drying, or longer depending on air and surface temperatures.
PRIMER
Before you paint, you must prime. Use a primer when painting over new wood or bare wood, or when repainting over bright or dark colors.
When picking out a primer, read the label. Make sure it has excellent adhesion to your current surface, hides stains well, is blister resistant, dries quickly and has low odor.
If you are only touching up areas of your house you won’t need a lot of primer. One gallon usually covers up to 400 square feet.
PAINT SELECTION
Do you have oil or latex paint on your house? Peel off a large paint chip. If the chip bends slightly before cracking, it’s probably latex. Oil paint chips snap easily. If you’re still in doubt, take a sample to your local paint store and have them test it.
Latex paint is an environmentally safe paint made from a water-soluble base. It’s easy to apply and cleans up with soap and water. It dries quickly (one to two hours), is nontoxic, and expands and shrinks with weather changes. Most companies offer a low-VOC* (volatile organic compound; see note below) or no-VOC paint. Latex paint is the kind most commonly used by professionals.
Oil-based paint is very durable and water resistant and less susceptible to shrinkage. It dries slowly, usually taking 24 hours to cure. Over time, it becomes brittle, and the color fades. It’s highly flammable and is susceptible to mildew. It cleans up with turpentine or paint thinner and is considered hazardous to the environment. Never put a new coat of latex over an old coat of oil paint without properly preparing the surface by sanding lightly or washing with TSP** (trisodium phosphate; see note below), a common paint-prep cleaner, and then applying a latex primer. If you skip this step, your new coat of paint is guaranteed to peel.
PAINT SHEEN
Walk outside and look at your house color. Is it dull or shiny or somewhere in the middle? That’s the sheen of your paint. Sheen describes the degree of light reflection paint has.
If you like the current sheen, stick with that. And if you have the old paint, the label on the can will tell you what the sheen is.
If you have an older home, a flat sheen will hide most siding imperfections and is a good choice for the body of the house.
Satin — sometimes referred to as eggshell — offers a good combination of easy cleaning and moderate sheen. It works great for trim, window frames and surfaces that need routine cleaning.
If you want a sleek, eye-catching look, a gloss sheen is your preference. It cleans easily, and is great for high-traffic areas like door jambs and window casings. But it shows imperfections and can fade.
COLOR
If you are confident of selecting the right color combination, go for it. Otherwise, there are lots of resources to try. Many paint companies, for example, offer tried-and-true color combinations; online, lots of sites show possibilities. Or you may want to hire a color consultant, who would be less expensive than repainting the whole house again.
Once you have the colors you think you want, buy a few quarts and paint small areas directly on the house in different locations. Or make sample boards.
Take a look at the paint during several times a day. Light and shade dramatically change the color of your house.
If you see a color combination on another home, politely ask the homeowners if they will divulge their color selection and brand of paint. I recommend not matching the next-door neighbor’s color combo.
SPRAY/BRUSH
If you plan to paint the entire exterior or a large portion of your house, a paint sprayer is the way to go. But be prepared for long hours of prep work. Everything that will not be painted must be covered.
Spray painting overrides surface imperfections such as gaps and cracks much better than a roller or brush and provides a superior, even coat of paint.
For painting small areas, invest in high-quality paintbrushes rather than economy ones. The good ones apply paint more thickly and smoothly, and hide brush marks. They do not shed or fall apart.
A 4-inch brush with tightly packed bristles is best for siding when needed. And an angled sash brush 1 inch to 2 1/2 inches wide is perfect for trim, window frames and moldings.
PAINTING
One rule you should never break is painting on bare wood. You must prime first.
Paint within a 50 to 80 degree air AND surface temperature.
Avoid painting in direct sunlight unless early or late in the day. The slower the paint dries, the better it sticks.
It will cost more, but using primer and two coats of paint is the way to go. Two thin coats are more durable than a single thick one.
NOTES
* The U.S. Green Building Council’s Green Building Guide (greenhomeguide.com) has this information on VOCs: They are carbon compounds that evaporate at room temperature and react in sunlight to form ground-level ozone, an integral component of photochemical smog. VOCs can cause respiratory, skin and eye irritation; headaches; nausea; muscle weakness; and more serious ailments and diseases.
**TSP — trisodium phosphate — available at most paint and hardware stores, has been the cleaner of choice for decades because of its ability to cut grease. But it’s very strong and can cause irritation and even burns, so be sure to follow the manufacturer instructions for mixing, clothing and safety precautions. You can also request a Product Safety Data Sheet (also known as a Material Safety Data Sheet) from the retailer.
If you are in the Greater Philadelphia area and are in need of pressure washing, power washing, window cleaning, graffiti removal or vehicle cleaning services, contact our Philadelphia Pressure Washing company at 215-703-8306.
Ask Angie: Lasting Deck Stain
By ANGIE HICKS
Dear Angie:
I’ve found deck staining, especially a cedar deck, is a real issue with stains not lasting more than one year at a time on horizontal surfaces in almost full sun. When I looked into what to use at the “big-box” hardware stores and paint stores, they all seem to think they have the right answer. But, after 8 years of trying to deal with this, I am almost ready to give up. What do you recommend? Is there a certain type of stain, not necessarily a brand, that I should look for? What causes it to wear off so quickly? Could I be doing something wrong when I apply it? And how long should good stain last?
John G., Indianapolis
Dear John:
Whether they’re oil-based or water-based, stains will not last long on horizontal surfaces, due to weather elements like sunlight, snow, ice and rain. Wear is most commonly caused by the sun’s ultraviolet rays deteriorating the stain surface. So, if your deck sits in nearly full sun, the horizontal surface is going to fade more quickly than one in constant shade or a surface that is vertical.
Most pros recommend you restain a horizontal surface every two-to-three years. That said, properly preparing, cleaning and drying the surface before applying a stain will yield the best results for the stain to last at least that long. You want to make sure there are no traces of sealant present on the deck. A high-volume pressure washer is best to clean and prepare the surface. However, a pressure washer can easily scar the deck surface, so unless you’re experienced working with one, that job is best left to a power washing professional.
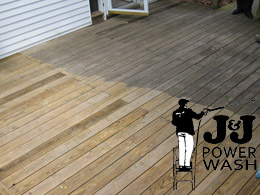
As far as the type of stain to use, a semi-transparent stain will sink deeper into the wood. Solid color stains are more like paint and will likely peel within a year. If you use a solid color stain and it starts to peel, there are really only two ways to fix it: strip it and reseal it, or keep touching it up.
For a more natural stained look, a good, heavy oil-based stain has the most longevity on a horizontal surface compared to a water-based product.
I recommend you consult with a reliable deck staining professional, who can come to your home and evaluate your deck firsthand. He or she can present the best options for getting the best looking and longest lasting finish possible.
Posted on Mon, Sep. 05, 2011 05:08 AM
Read more: http://www.kansascity.com/2011/09/05/3121807/ask-angie-lasting-deck-stain.html#ixzz1XHnoK8b9
If you are in the Greater Philadelphia area and are in need of pressure washing, power washing, window cleaning, graffiti removal or vehicle cleaning services, contact our Philadelphia Pressure Washing company at 215-703-8306.
As Weather Changes, Homes Need Care
As Weather Changes, Homes Need Care
Posted Today 02:01 pm)
Each season homes go through changes in temperatures, weather conditions and aging. In order to keep all the components of a home running smoothly and to avoid costly repairs later, it’s helpful to conduct seasonal maintenance actions each season.

As the summer continues, this is a perfect time to prepare for fall.
Depending on the climate, the fall season may be too late to prepare if it gets cold quickly. Regardless of location, start these helpful tips now to save money and get a jump on the season.
* Examine the roof, gutters and downspouts for debris — The roof is often forgotten about because it is not at eye level to give a subtle reminder about maintenance. Clear leaves, dirt and pine needles from gutters and examine downspouts for damage or loose pieces — check the flashing around the chimney and any openings in the roof, such as skylights for leaking problems.
* Examine property grounds — Before the grass is covered with snow, or it is too cold to venture outside, check walkways for cracks and loose paver material. Fix walkway and entryway areas before slippery weather can cause a tripping or falling accident.
* Change the home filters — Those who have a central air conditioning system should change the air filter regularly. Those who have a window air conditioning unit should remove it from the window or place a waterproof cover over it to prevent damage. Change filters in stove vents, clothes dryers and room fans if applicable. Clean air filters will keep a family healthier in the fall months.
* Repair leaky faucets — Before the temperatures start to dip low, examine leaky faucets in the kitchen, bathrooms and utility room locations.
* Prepare the fireplace — Some people use the fireplace more than a central heater in the fall and winter months. Discard old ashes and ensure the damper is open to allow air to freely move through the chimney. If the air becomes cold, close back the damper after cleaning. Check the damper handle and springs to ensure the flue is operating correctly. Hire a professional chimney sweep if needed.
* Drain the hot water heater — Residential areas with extra amounts of hard water sediments could cause build up in the tank. Drain the tank and make sure rust is not developing. If the hot water heater is extremely old or is rusting, consider a new one that will be more cost effective and energy efficient.
* Check windows and doors for drafts — The majority of conditioned air in the home is lost through the windows and doors. Check the home and open windows to ensure the seal and caulking around the window frame is in good condition. Think of adding heavier drapery around windows that are extra drafty, to help block some air infiltration.
* Clean and store seasonal outdoor furniture — Power wash the outdoor furniture and cushions. Once dry, store cushions in dry area to prevent cracking and fading over the fall and winter months.
* Have garden power tools serviced — Once grass begins to enter the dormant stage, sharpen the blades on the lawnmower, trimmer and other tools and get engine fluids recapped off. When shopping for new garden power tools, buy when the season is almost over for cost cuts.
* Take care of irrigation and lawn needs — Depending on where residential region, the climate for the lawn and its irrigation system may need to be checked. Consider hiring an irrigation service professional to fix broken heads before the cold weather sets in. Fertilize to prevent spring weeds and winter lawn damage.
Visit a local garden center to find out information on what type of fertilizer to use and when to spread it.
If you are in the Greater Philadelphia area and are in need of pressure washing, power washing, window cleaning, graffiti removal or vehicle cleaning services, contact our Philadelphia Pressure Washing company at 215-703-8306.
Sticky Deck Problem Raises More Questions
Sticky deck problem raises more questions
Bill Burnett,Kevin Burnett
Wednesday, August 31, 2011
Recently we published a response to a reader who had a problem with a sticky deck. It seems her handyman didn’t read the instructions on the sealer can and got carried away. In this case, more was not better. The sealer pooled and dried to a sticky film.
We told our reader to give the spots a good scrubbing with acetone (lacquer thinner), rinse and finish with a light sanding. As often happens, a question begets more questions and different answers.
Here’s what this column generated:
Q: You mention redwood in your article. Our deck is cedar, which splinters a lot. I have had it power washed in previous years, but I think that might have made it worse. How would you treat a cedar deck?
A: The same as a redwood deck. Power washing with no sealer makes for dried-out wood and splinters. Power-wash the deck, let it dry and apply a sealer. As we’ve said many times before, we’ve had good luck with Duckback and Preserva Wood products. ( www.preservaproducts.com and www.superdeck.com).

Q: I saw your article and have a question: My deck is made from pressure-treated wood. In the past when I have applied deck stain, it looks great for a few months, then starts to wear off. By the next summer it looks as if it never penetrated the wood. Is that because the wood is pressure treated? Will the Preserva Wood or Duckback product do a better job than the product I have been using?
A: If the product you have been using is deck stain, the answer is yes. Stain will not penetrate pressure-treated wood. Pressure-treated wood is infused with a chemical preservative under pressure to prevent fungus and insect damage. If you cut a piece of PT lumber and look at the cut end, you’ll see 1/16 inch to 1/8 inch of penetration of the preservative. This prohibits water and stain from penetrating. If you continue to stain, count on a yearly project.
An old salt offered this suggestion:
“An old boat trick for too much sealer (tung oil or urethane) applied to teak decks: Apply 90 percent rubbing alcohol with bronze steel wool. It couldn’t hurt to try it on a small patch. Rubbing alcohol is cheap.”
We agree. It sure won’t hurt, and if it works, you won’t have to glove up and use a respirator, which you’ll have to do if you use acetone.
Finally, a manufacturer of wood stain pitched his product for cleaning up mistakes:
“I believe I have a safe and environmentally friendly solution to his predicament. We manufacture Penofin, a wood stain that is similar to Preserva Wood. A few years ago we launched a line of cleaners to help consumers prep their wood prior to staining as well as solve the more common problems associated with over-application.
“A sticky or tacky deck is usually due to over-application or failing to wipe the excess stain from the surface of the wood. We recommend our Penofin Pro-Tech Cleaner Step 2. This is a product that comes in powder form. You mix 1 cup to a gallon of water, wet the wood and apply the solution to the wood surface. Agitate lightly with a stiff bristled non-metallic brush for approximately 15 minutes. Rinse thoroughly with a garden hose and spray nozzle, and let the wood dry. This removes any tackiness or residue.”
We haven’t used this product, so for us it’s neither a pick nor a pan. We would probably give it a try. If it works it’s a good “green” way to go. If you would like more information, the website is www.penofin.com.
Read more: http://www.sfgate.com/cgi-bin/article.cgi?f=/c/a/2011/08/30/DDG91KQR4P.DTL#ixzz1WcgtbzP5
If you are in the Greater Philadelphia area and are in need of pressure washing, power washing, window cleaning, graffiti removal or vehicle cleaning services, contact our Philadelphia Pressure Washing company at 215-703-8306.
Your Place: A homeowner’s advice on caring for a deck
Your Place: A Homeowner’s Advice on Caring for a Deck
August 19, 2011|By Alan J. Heavens, Inquirer Real Estate Writer
Reader Alden Smith of Wayne offers some words of wisdom on deck care and maintenance:
“My cedar-plank deck is 19 years old and is in very good condition. Each year, I apply Olympic semi-transparent, oil-based product. I use a sponge-mop applicator with a roller pan to apply. This is an easy and quick method.
“I have had to replace a few boards … from time to time. … I only replace the bad section by using a sabre saw to cut it out. Then I attach a new cleat to the deck frame and drop it in place.
“I use a Cabot stain to color the new section to duplicate the existing color and then apply the Olympic.
“The deck is on a sloping hill with a lot of ventilation. This is why it has lasted so well.”
His daughter had a deck built by the same contractor using cedar. Since her deck is only a few feet off the ground, it has rotted badly. It has been coated every few years.
Now her 17-year-old deck will be replanked using Trex, the composite wood product.
“I would advise a deck built close to ground level be constructed of Trex or similar material,” Smith said. “More expensive, but it will last a long time.”
Painting weathered wood. Our expert, Debbie Zimmer of the Paint Quality Institute, is back this week with tips on painting weathered wood. When painting a home with a wood exterior, it’s not unusual to find areas that are weathered.
Sometimes, this is because it has been years since the last paint job. But even new construction – a recent addition – can be weathered after only a few weeks if unpainted wood is left exposed.
“If the wood exterior you’re about to paint meets one of these descriptions, you’ll need to do some extra surface preparation,” Zimmer said. “That’s the only way to end up with a quality, long-lasting paint job.”
Assuming the wood was painted previously, start surface preparation by scraping away loose or peeling paint.
Dry rot (dry, crumbly sections of wood) and wet rot (soggy, soft spots) are both caused by microorganisms that thrive in damp conditions.
Rot can destroy the wood so completely that a finger can be pushed right through it. To test for rot, poke suspicious-looking boards with an awl; if it goes in easily, the wood has rotted.
If you are in the Greater Philadelphia area and are in need of pressure washing, power washing, window cleaning, graffiti removal or vehicle cleaning services, contact our Philadelphia Pressure Washing company at 215-703-8306.


